Doll Repaint- Making a Goat Nymph
Hello!
There are no finished pieces to post this week, mainly because I have been working on a new doll. So, I am here to post some work in progress photos of her- warning, nude doll parts and disembodied limbs!
I deconstructed her months ago, so all the factory paint and hair removal has not been documented.
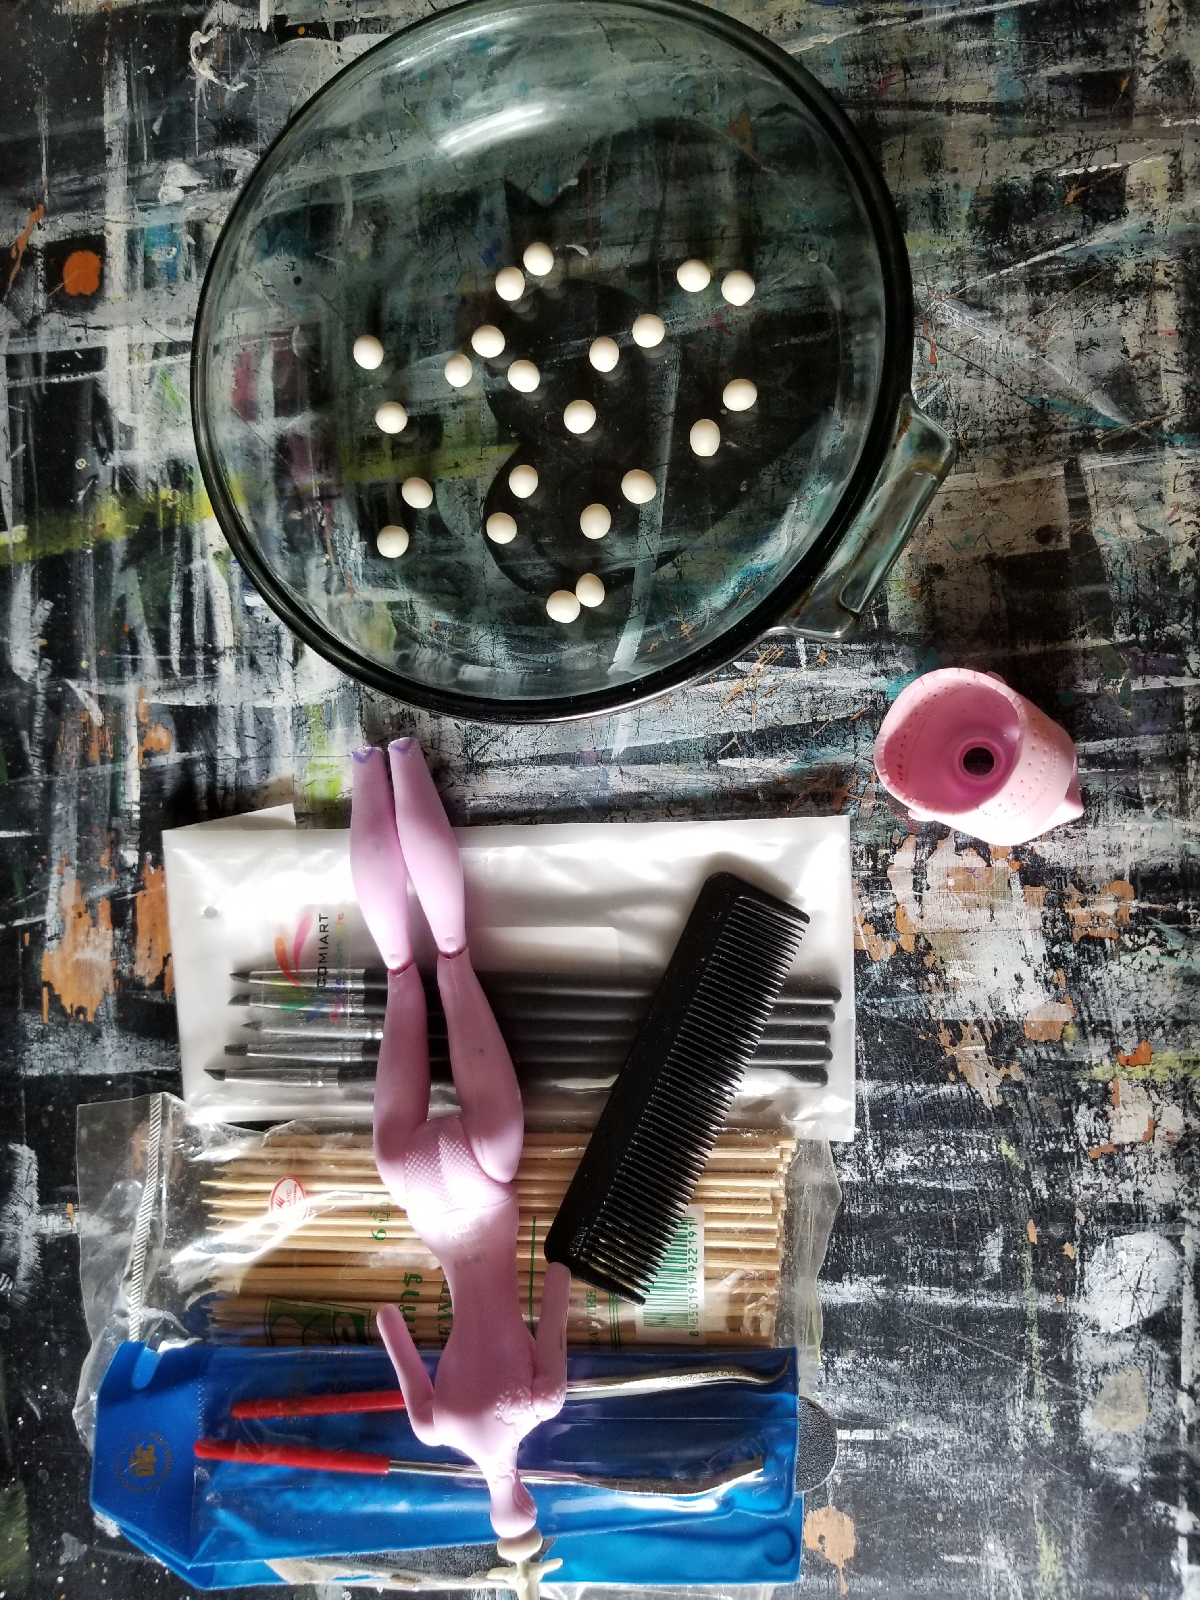
Above, the body, with head removed. I also cut open the back of her head after removing her hair, as I want to give her 3D eyes. The little white balls you see are eyeball whites (sclera)- I will use the butt end of a small paintbrush to give them indents. Other supplies are bamboo skewers (to give her goat legs), some sanding implements, and some clay shaping tools. Also a random comb.
I love how Monster High doll feet are shaped. Unfortunately, for this character, I had to remove them, as she will be getting hooves. You can see the base sculpt of them, along with her tail. I used bamboo skewers, tinfoil, wire, and florist tape to create a structure for the clay. Her calves have been cut at an angle (I hand saw them, as I have found that the rotary tool saw spins so fast it melts the plastic. Slow and steady). I attached additional bamboo skewers and wite to her calves with epoxy.
The eye holes have been cut out of her head and shaped as identically as I could get them.
Some test eyeballs- I got new resin and wanted to see how it worked. These are older eyes that I sculpted and painted last year. I remembered after they cured that I will need to get all the bubbles out of the resin. To do this, I simply pass a lit flame over the top of the resin (without touching it) to create heat. The heat pops the tiny bubbles, then I can cure them under my UV lamp. The white fringe is acrylic yarn that I have partially brushed out, for hair. It has a few more steps before it is ready.
If you are not bored by now, I commend you! This is the first layer of polymer clay over the hooves. I use these colors for bulking up the sculpt, because I have a lot of yellow/orange, and they will be covered with another layer of clay.
The final sculpt- I will be adding some paint and some fur, and of course will attach them to the body, but for now this is as far as I've gotten! I also finished her tail, but for some reason neglected to take photos.
Okee, so, hugs for all, thanks for reading!
Xo!
Em


Comments
Post a Comment